Wednesday 17 June 2015

Conclusion

So my passion project has come to a close. I've completed most my goals I think. I've gained a fairly solid understanding of Revit. I've made two custom families. I've learned how to present and render my projects so that they look nice, and I have learned a lot about this career.

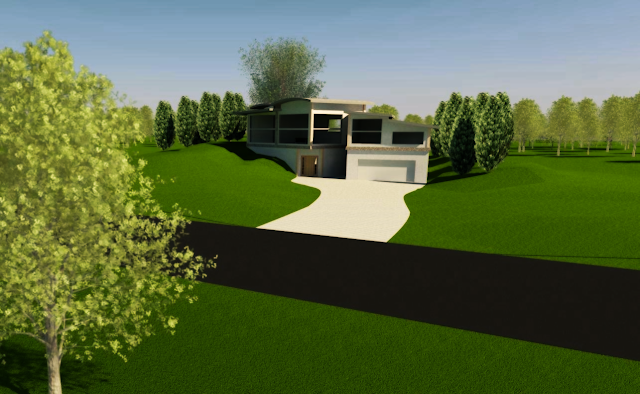
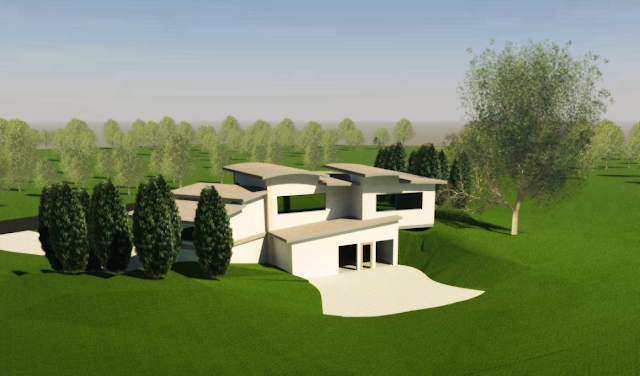
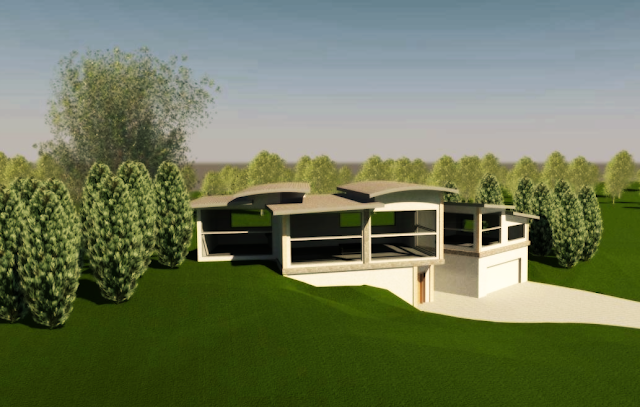
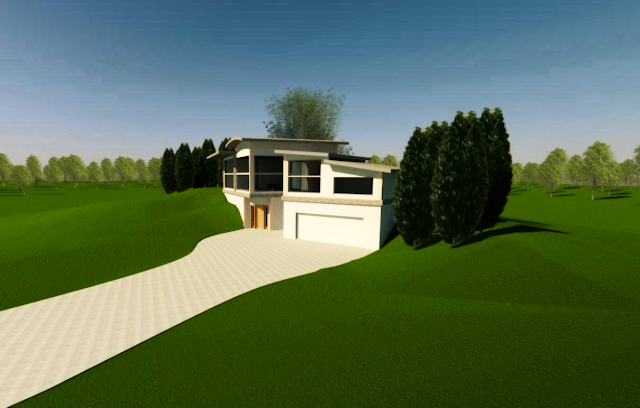
The house in it's final state:
The two families that I made:
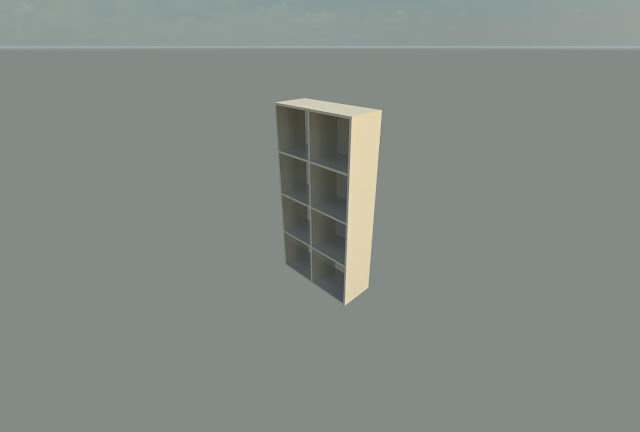


Both of these objects are almost identical copies of things in my house. I took the measurements and put them into the program so everything is accurate and to scale. The desk was made using Autodesk Inventor and exported to Revit, while the shelf was made completely in Revit.


Architecture and Interior Design is still a major interest, but after this project I'm not as sure that I want to go into architecture as a career. I got pretty frustrated with Revit at times, and at those times I couldn't really imagine myself sitting at a desk doing that from 9-5 every weekday. That may because I have not mastered the program yet, when I'm better I will probably get frustrated less. I also came to realize that perhaps I only want to design my own house. I imagined trying to take clients into consideration and I think I might have trouble trying to get our creativity aligned. I enjoyed making this house because I could do whatever I wanted. If I had to consider budget restraints and specific client requests it might be less of an art and more of a grind for me.

Biblical Through Lines:

The through lines that I have chosen include Beauty Creating, Earth Keeping, and Community Building.

I chose beauty creating because I am (at least in my opinion) creating beautiful things. Regardless of whether you like what I designed, I'm using my God given skills and resources to create things.

I chose earth keeping because I had originally designed this house with the environment in mind. The use of natural light will keep heating and electricity bills down, and I had intended this house to be off the grid and make use of renewable energy.

I chose community building because architects literally build the community. They have a lot of influence and are able to bring people together by designing things like churches or community centers.

Sunday 7 June 2015

Changing Goals

I didn't really state it in my opening comments post, but I had intended to design a house and an interior for that house. I have almost finished the exterior of the house, and I am mostly satisfied with it. But the interior of the house isn't finished, and as I started working on that I realized that I really didn't do a good job of space management. The exterior looks good, but the interior is inefficient and difficult to work with. Because of that, I am probably going to finish up the exterior of the house and then make a separate project to do some interior designing. The two projects won't be connected at all, and the second project will not have an exterior component connected to it.


I've finished the structural parts, all that is left to do is finalize the window, column, and sweep placement. (Sweeps are the stone textured rectangles around the edges of the building).

This project is quickly coming to a close, by the end of the week I will be presenting. By then I hope to have this exterior project finished and a modern style master bedroom finished as well.

Sunday 19 April 2015

Messing around with landscaping

So landscaping, or Topography as it is called in Revit, is easily the most annoying and finicky thing to work with. It's a pretty big pain to get it to look exactly the way you want, but it is worth it in the end.


In this render you can see that I've done some rough work on the landscaping and have added a driveway, this is all mainly for showing off the concept, the final driveway and landscaping will look quite a bit different I'm sure. As you can see I've also started on a master bedroom, that too is in the fairly rough stage and will probably change a lot. For the curved section of the master bedroom roof I used a segment of a circle to define the curve. On the other curved roof section, I used a spline, which is a curved line that you can define using several points put in different places called control vertices.


A spline gives you a lot of freedom, and it has many uses. But in this case I think I may want to stick to the more symmetrical circle segment for all curved parts of the roof, it just looks better to me.

I have a few more things I would like to add to this house, the bedrooms and bathroom on top of the garage, and a small walkout basement in the back. After those have been finished I can start focusing on the details of house and I can start furnishing the interior. In the interest of time, I probably won't furnish the garage (or I'll just throw in a model of a car there or something) nor the bedrooms (although I will furnish the master bedroom).


For my next post I think I'll try to explain some more theory and show some cool things you can do with Revit.

Saturday 18 April 2015

Finally looking like a house

So I have finally gotten to a point where my building actually looks like a place you could live in. I kept the same general idea for the second floor, but the roof was changed fairly drastically. I've added in some temporary windows on the top floor, most likely the finished glass will be arranged different. I'm planning on putting some bedrooms and a bathroom on top of the garage.


Thursday 9 April 2015

Progress

So I have finally started on a serious architecture project. The first house you saw in the last post ended up being more for learning and playing around. I was not super satisfied with the direction that it was going in, so I decided to start fresh and with a new idea in mind.


This is a very basic outline of the top floor of a house. As I see it now, it would have a kitchen, a dining area, a small couch area, and a bathroom. I am a huge fan of using natural light as much as possible, hence the large windows on both sides. I will also probably put some skylights in the roof. I'm not super happy with the way these windows are laid out at the moment and I will probably change it some. There will also probably be some windows in the empty brick underneath the curve of the roof.

The first floor, which I have not designed yet, will most likely be a combination of a mudroom, an entertainment area, an exercise room, and possibly a mini-kitchen/bar setup.

Adjacent to the right side of the building above will be the garage. On top of the garage I will probably put 2-3 bedrooms. The master bedroom will most likely be to the left and behind of this current building.

This may be the second floor of the house, but from certain angles it most likely won't look like it is. I  plan to have most of the first floor buried, so that only the front door and a walkout basement in the back will be shown. The master bedroom will also have dirt built up underneath it, so that it will be at the same height as the current building.


Sunday 15 March 2015

First Look

So I've mainly been playing around in Revit for the past little while. Just trying to learn the basics and start to know my way around the program.
Right from the get-go, I was a little discouraged. The user interface is different from other programs that I've used. For example, in Autodesk inventor the orbit tool that allows you to change your view of the model is easy to access with a hotkey, but not in Revit.
One big issue I realized right away was how basic the modeling system seemed. You can plunk down walls and change their size but I could not see a way to make your own walls with their own shapes and small details, all I had to work with was a flat wall that I could change the colour of. Eventually though I realized that it's much more powerful than I first thought. Apparently you can add a lot of detail to walls with these things called "sweeps and reveals". I have no idea what that means but I suppose I will find out. At least now I am sure that I won't be restricted to a boring flat wall. I also learned how to change the structure of walls and such, so that I could make it so that a wall has brick on the outside, wooden stud and insulation in the middle, and drywall on the interior side. I can manipulate all those materials separately and change texture or colour independently of the rest of the wall.

I have started drawing my first building. I find that when I do creative things, like drawing or writing, it's best to just start doing it and let the inspiration come as you go along. So I started by drawing an "L" shape and adding in floors and a roof.


As you can see from the render, it doesn't look like much. I haven't really started adding detail to the walls, so for right now they are just a generic grey colour. 


Above is a screenshot from Revit. The blue reference plane represents ground level. Yeah...it doesn't really make much sense does it? The part behind the main house is going to be a walkout basement I think, and the front door above the garage door will have a small balcony and stairs adjacent to the driveway. I haven't quite figured out how to work with landscaping in Revit yet, but once I do I hopefully will have a better visualization of how it will all work.
I'm also not a huge fan of the roof at the moment, I think I might make one that is either flat or has a very slight incline.


On my goals page I've outline several things I want to achieve, but I didn't really state what my final project will be. To be honest I still don't really know. This house here might be my final project (although it will probably look very different by the end), or I might start a different project and design a business complex or another large public building like that.

Friday 27 February 2015

Opening Comments

For my Passion Project I have decided to do architecture/interior design. Architecture, and design in general, have been interests of mine for a long time. Architecture will probably be what I pursue after I graduate in a year and a half. 

Most of this project will be entered around Autodesk Revit. Revit is a BIM (building information modeling) software suite written by CAD (computer aided design) company Autodesk. This project may include components of Autodesk Inventor as well as Autodesk 3ds Max. Usually, these 3 software suites would cost over $15000, but Autodesk has a program where you can get a 3-year license for student use. It's incredibly generous of them (also a pretty good marketing strategy) and a lot of students wouldn't be able to pursue their dreams of becoming an architect or an engineer without them.


Goals:

Primary:
Gain a solid understanding of Autodesk Revit:
- Be able to make fully custom parametric families 
- Understand the material system and be able to make objects look the way I want (possibly by creating my own materials)
- Get proficient enough to know exactly how to do things and do them efficiently, instead of finding my own workarounds that will eventually be detrimental to my proficiency later on.
- Learn how to make what I design look good; learn to use the cloud rendering system and possibly use Autodesk 3ds Max to get an even more professional render.

Secondary:
- Learn more about CAD in general. Most, if not all, of my passions or interests (or career possibilies) include the use of CAD at some point. Being knowledgeable in CAD in general will be beneficial for me.
- Learn more about the career of architecture, may include job shadowing.